
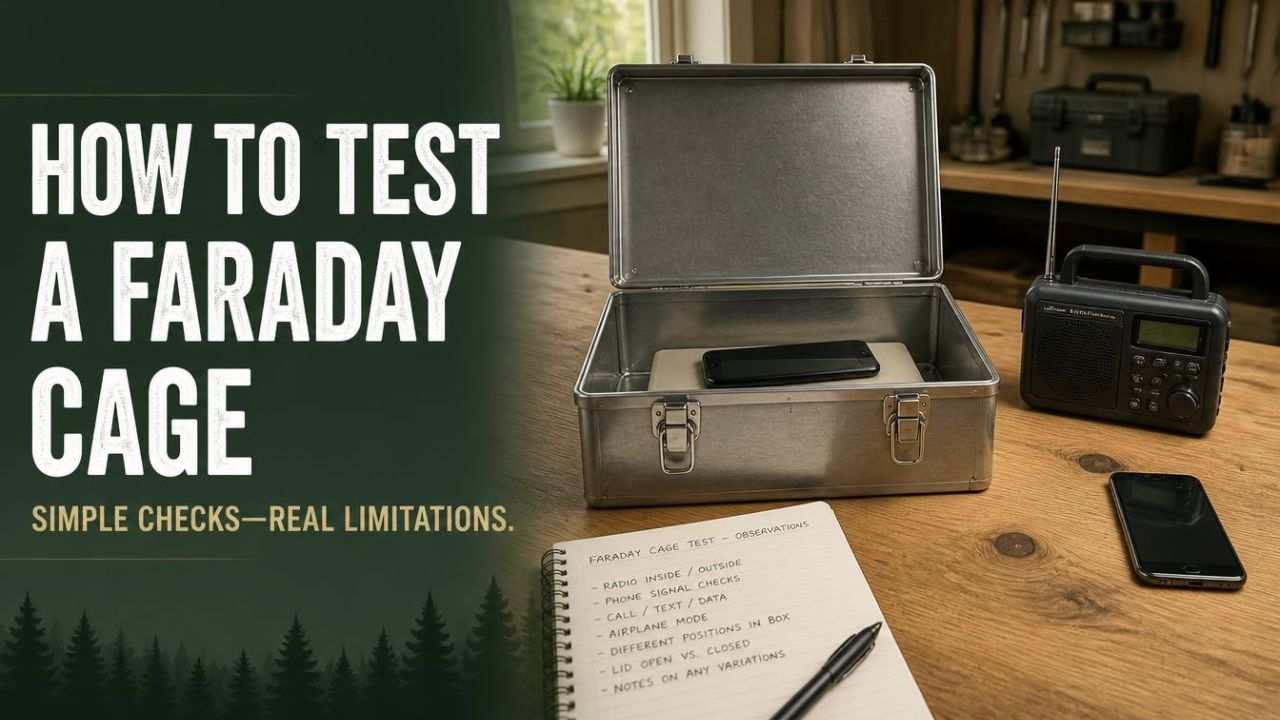
I would rather keep an honest notebook of limited results than label a homemade box “EMP proof” after one missed call. This guide explains simple checks, common testing mistakes, and when you need better evidence.
Understand What a Home Faraday Cage Test Can Tell You
A Faraday enclosure uses conductive material to reduce electromagnetic coupling between its interior and exterior. Its performance depends on the complete enclosure, including seams, closures, openings, and any cables crossing the boundary.
The CISA EMP Protection and Resilience Guidelines distinguish basic protective measures from systems with specified shielding and acceptance-testing requirements. A household connectivity check is not the same thing as those measurements.
Think of a home test as a screening exercise. You can observe whether a particular device communicates under particular conditions, but you cannot calculate broad shielding performance from that alone.
For example, a receiver might lose a weak signal after modest attenuation. Another receiver near a strong source might still work even when the enclosure reduces the signal substantially.
Neither observation gives you a calibrated decibel measurement. That requires appropriate equipment, known conditions, and a defined testing method.
- A successful connection shows that the tested communication link remained usable.
- A failed connection suggests that link was interrupted, provided your controls still work.
- Neither result measures attenuation across an entire frequency range.
- Neither result establishes resistance to a specified EMP exposure.
- Documented laboratory results answer different questions from a home demonstration.
My preferred description is “no connection observed during this check,” not “passed every shielding test.” It sounds less exciting, but it is much more useful.
CISA also treats the protection of connected equipment as a larger engineering problem. A storage container holding unplugged spares is not equivalent to a protected system with incoming power, data, and antenna connections.
Keep that distinction in mind before deciding what your experiment needs to show.
Inspect the Enclosure and Establish a Baseline

Before testing signals, inspect the enclosure according to its manufacturer’s instructions. Look for damage, a lid that does not seat properly, worn closure surfaces, loose fasteners, and objects preventing full closure.
For a flexible shielding bag, check folds, seams, and the required fastening sequence. CISA’s guidance highlights that performance can vary between products and that closure details matter.
I would avoid changing several things at once. If you replace the liner, move rooms, fold the bag differently, and change phones, you will struggle to identify what caused a different result.
Use a simple setup with familiar devices. You do not need to build a transmitter or create a pulse.
- One charged smartphone for the enclosure.
- A second phone or another way to place an ordinary call.
- A small battery-powered radio, if available.
- A notebook or printed observation sheet.
- A clock for recording the order of observations.
Work with an enclosure disconnected from external power and signal cables. Do not pinch a charger or headphone lead through the lid, because that changes the configuration you are examining.
Protect exposed battery terminals from conductive surfaces and avoid crushing or overheating devices. Do not use a damaged or swollen battery.
Next, establish the baseline: verify that the phone or radio works at the chosen location before putting it inside. Then confirm operation with the device in the open enclosure.
Those are your controls. If reception already fails with the lid open, a closed-lid failure tells you very little.
Never use a functioning microwave oven as a test chamber or switch an appliance on with electronics inside it. Use an appropriate storage enclosure instead of mixing this experiment with cooking equipment.
Run a Phone and Wi-Fi Connectivity Check

A phone check is convenient because many households already have the equipment. Treat it as a comparison of communication behavior, not a measurement of EMP protection.
First, decide which connection you are checking. Cellular service and Wi-Fi are different links, so test them separately rather than leaving every connection enabled and guessing what happened.
For a cellular-only check, turn off Wi-Fi, confirm airplane mode is off, and verify that an ordinary call reaches the phone outside the enclosure. Do not use emergency numbers for testing.
Then follow the same sequence each time.
- Call the phone while it is outside the enclosure.
- Place it inside with the lid open and confirm that the call still arrives.
- Close the enclosure fully using the intended closure method.
- Place another ordinary call and record what happens.
- Reopen the enclosure and confirm that connectivity returns.
- Repeat the sequence to check whether the result is consistent.
Wait for the phone to reconnect between trials. If it remains disconnected after reopening, re-establish normal service before drawing conclusions about the enclosure.
A missed call can also result from settings, coverage problems, network behavior, or a flat battery. That is why the before-and-after controls are important.
For a separate Wi-Fi check, disable cellular service and explicitly enable Wi-Fi. Confirm a live connection before and after closing the enclosure, without moving the router or changing the test location.
A cached webpage does not prove that the phone still has internet access. Likewise, signal bars are not calibrated shielding measurements.
Do not interpret a device screen viewed after reopening as a perfect record of the closed interval. Reconnection may already have occurred.
The strongest practical conclusion remains narrow: a specific link did or did not work during your controlled comparison. It does not establish coverage across other frequencies or protection against a pulse.
Use a Battery Radio and Troubleshoot Inconsistent Results
A small battery radio offers another observation, especially when you can receive a stable live broadcast. It samples a different radio service from a cellular or Wi-Fi check, but it still does not characterize every relevant frequency.
Choose a station that comes in reliably outside the enclosure. Keep the volume, tuning, antenna position, and radio orientation unchanged throughout the comparison.
Place the radio inside with the lid open, verify reception, then close the enclosure properly. Listen for changes and confirm the original reception returns after reopening.
Remember that you are listening through a physical container. A quieter sound can come from acoustic muffling, so reduced loudness alone is not proof that the radio signal disappeared.
- Use a stable live broadcast rather than prerecorded audio.
- Check reception outside and inside the open enclosure.
- Keep the radio and antenna in the same position.
- Close the enclosure without leaving wires across the boundary.
- Record whether the broadcast remains intelligible or reception changes.
- Reopen and verify the baseline again.
If the sound is simply too muffled to judge, mark the result inconclusive. There is no benefit in turning an uncertain observation into a confident label.
If results vary, inspect the closure first. Look for trapped fabric, debris, incomplete fastening, or a different lid position between trials.
Change one variable at a time, then repeat the open-and-closed controls. Keep notes about what changed.
CISA’s guidance warns that common metal containers are not automatically reliable EMP enclosures. A household experiment should not be used to promote an improvised container as equivalent to tested equipment.
Do not create sparks, use ignition devices, build pulse generators, or improvise high-voltage tests. These introduce hazards without providing a valid substitute for professional shielding measurements.
Also avoid adding a ground wire as a universal “fix.” Grounding, bonding, and cable-entry protection depend on the system and should follow qualified design guidance.
Document Results and Evaluate David’s Shield Separately

A useful test log is modest and specific. I would record the enclosure, device, connection type, location, closure method, and observations before, during, and after closure.
Use descriptions such as “cellular call arrived,” “connection not observed,” or “radio result inconclusive.” Do not write “80 dB shielding” unless an appropriate measurement actually established that result.
For consequential protection decisions, request a report covering the complete product, relevant frequency range, test method, and closure configuration. CISA’s acceptance-testing framework illustrates why defined measurements matter.
- Date and enclosure model or description.
- Device and tested communication service.
- Outside and open-lid control results.
- Closed-lid observation.
- Reopened control result.
- Changes, damage, or uncertainty noted during the trial.
David’s Shield is a separate educational purchase. Its vendor describes educational information and DIY plans, not independently verified shielding hardware.
The accessible offer does not establish that it includes a validated Faraday-testing procedure or certified enclosure design. Ask for those details rather than assuming they are included.
You can visit the David’s Shield review as another research step and compare its claims with the current offer.
Before purchasing, confirm the contents, additional materials, implementation costs, support, and refund terms. Faith-inspired preparation can coexist with careful technical verification.
If an organized learning resource interests you, review the current David’s Shield details without treating the purchase as protection already achieved.
Conclusion: Screen for Leakage, Not Guaranteed Protection
Learning how to test a Faraday cage at home starts with inspection, working controls, repeatable connectivity checks, and honest notes. A phone and battery radio can help you notice obvious problems.
They cannot certify attenuation across a frequency range or establish EMP protection. “No connection observed” is a useful result; “guaranteed protection” is a different claim entirely.
Keep the procedure safe, repeat checks when the enclosure changes, and seek documented testing when the outcome matters. If David’s Shield interests you, evaluate it as educational material—not a replacement for measurements or protective equipment.