
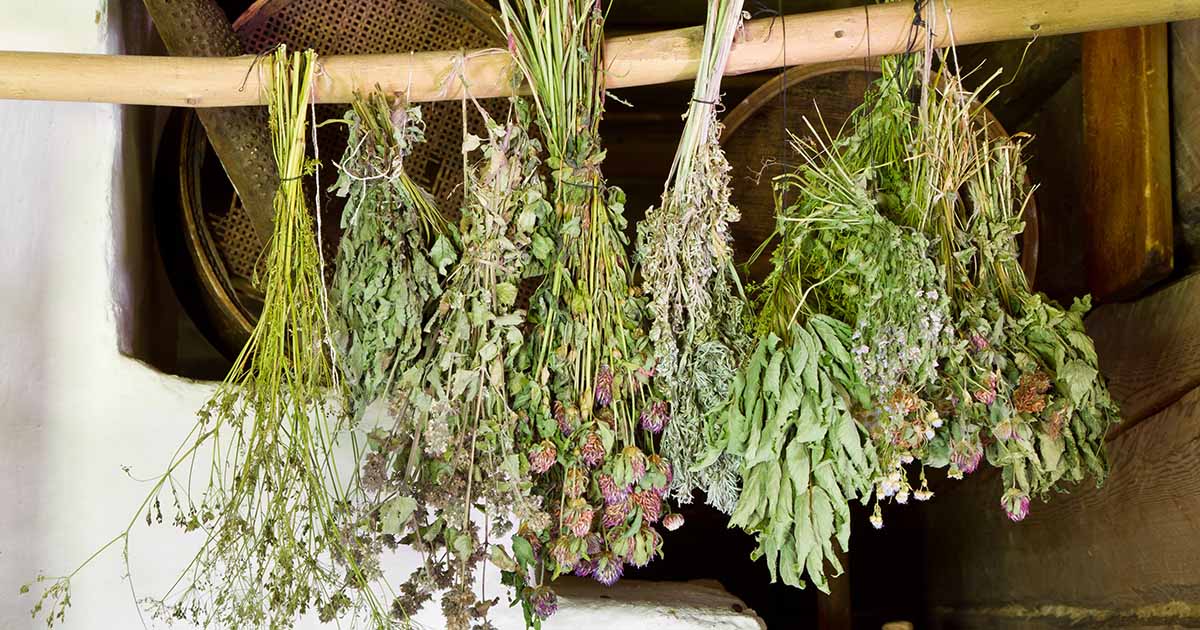
There’s nothing quite like the scent of freshly cut herbs hanging in bundles across a sunny room.
With the right techniques, you can preserve that peak-season flavor and aroma for months of teas, tinctures, and simple home remedies.
Many gardeners grow medicinal herbs but feel unsure about the best way to harvest and dry them without losing potency.
In this guide, you’ll learn how to dry medicinal herbs step by step, including when to harvest, how to prepare plant material, drying methods, storage tips, and common mistakes to avoid.
Homemade herbal preparations are intended for general wellness and self-care, not as a replacement for medical diagnosis or treatment.
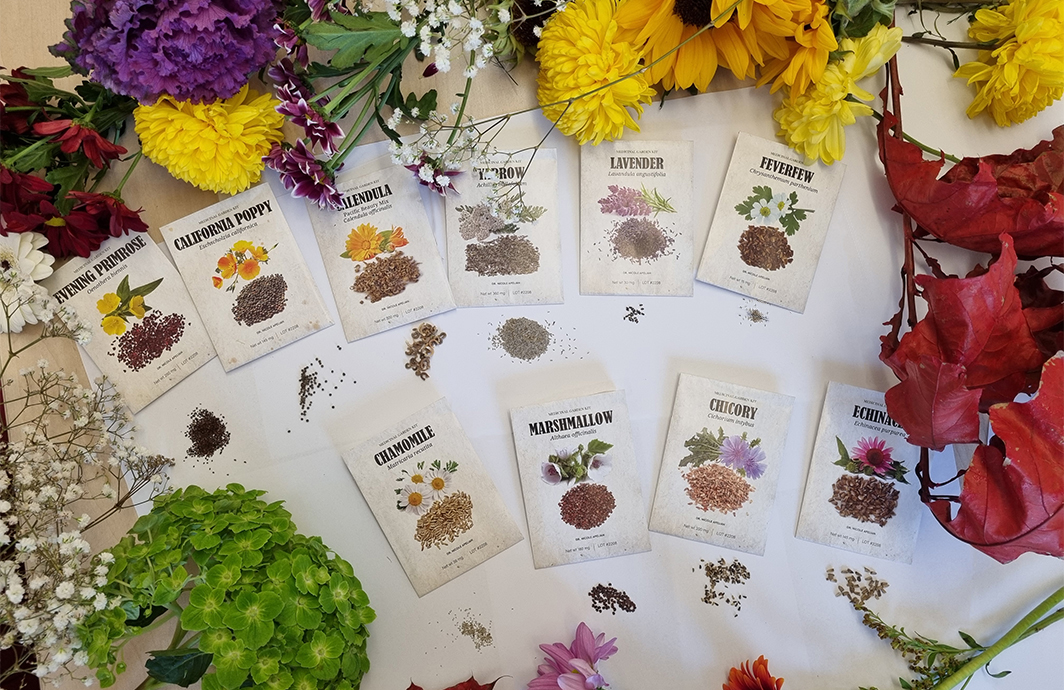
Gardeners who want a curated starting point may explore the Medicinal Garden Kit, which includes several popular medicinal herbs ideal for drying.
Why Proper Harvesting and Drying Matters for Medicinal Herbs
Timing and technique matter a lot when it comes to medicinal herbs. Harvesting at the right stage maximizes flavor, aroma, and traditional potency.
Proper drying preserves plant compounds and reduces the risk of mold. I’ve had to toss whole batches because they went musty.
Moldy or musty herbs should be discarded. Over-dried or heat-damaged herbs can lose aroma and quality too.
Home-dried herbs give you greater control over growing and processing conditions. You can harvest in small batches and use year-round.
There’s also real cost savings compared to buying pre-packaged dried herbs. Different plant parts require different handling though.
Delicate leaves and flowers vs. thicker roots and bark need different approaches. Fresh vs. dried use in teas, infusions, and tinctures also varies.
The Medicinal Garden Kit includes herbs like calendula, chamomile, lavender, lemon balm, echinacea, and yarrow, all commonly dried for home use.
For a closer look at what’s included, read our full Medicinal Garden Kit review.
- Harvesting at the right stage maximizes flavor and potency.
- Proper drying preserves compounds and reduces mold risk.
- Home-dried herbs offer control and cost savings.
- Different plant parts need different handling methods.
- Discard any herbs that smell musty or look moldy.
When to Harvest Medicinal Herbs for Best Quality

General harvesting windows vary by plant part. Leaves are best harvested before or just as flowering begins.
Flowers should be picked when fully open but before petals start to fade. Roots are typically harvested in fall after foliage dies back, from mature plants.
Seeds are collected when seed heads are dry but before they scatter. Time of day matters too.
Harvest after morning dew has dried. Avoid harvesting in the heat of midday when essential oils may be more volatile.
Choose dry days whenever possible to reduce moisture. Growth stage affects quality as well.
Young, tender leaves vs. older, tougher foliage make a difference. First flush of flowers vs. late-season blooms also matters.
Lemon balm and mint are best harvested before flowering for peak aroma. Chamomile and calendula flowers should be picked when fully open.
Echinacea roots are harvested from 3+ year-old plants in fall. The guide included with the Medicinal Garden Kit is promoted as covering cultivation and harvest timing for its 10 herbs.
- Harvest leaves before or just as flowering begins.
- Pick flowers when fully open, before petals fade.
- Harvest roots in fall from mature plants.
- Collect seeds when dry but before scattering.
- Harvest after dew dries, on dry days.
Preparing Herbs for Drying: Cleaning, Sorting, and Pre-Treatment

Post-harvest handling starts with gently shaking off excess dirt and insects. Avoid washing unless necessary; if washed, dry thoroughly.
Sorting and grading is important. Remove damaged, diseased, or discolored material.
Separate different herbs and plant parts to ensure even drying. Pre-treatment options are optional and herb-dependent.
Lightly brush off dust instead of washing. Chop larger leaves or roots for faster, more even drying.
Leave small flowers and delicate leaves whole. Hygiene and equipment matter too.
Use clean baskets, trays, or paper bags for transport. Work on clean surfaces with sharp, sanitized scissors or knives.
Some herbs are more delicate than others. Lemon balm and mint bruise easily; handle gently.
Roots like echinacea may need thorough cleaning and chopping. Herbs from the Medicinal Garden Kit, such as chamomile, lavender, and yarrow, benefit from careful sorting to maintain flower integrity. [medicinalseedkit](https://medicinalseedkit.com/kit/)
- Gently shake off dirt and insects after harvest.
- Avoid washing unless necessary; dry thoroughly if washed.
- Remove damaged or discolored material before drying.
- Separate different herbs and plant parts for even drying.
- Use clean equipment and handle delicate herbs gently.
Air-Drying Medicinal Herbs: Step-by-Step Methods

Air-drying is the most common and gentle method for many herbs. It’s ideal for leaves, flowers, and some stems.
When done correctly, it preserves aroma and color. The hanging-bundle method works well for many herbs.
Gather small bunches of stems and tie loosely. Hang upside down in a warm, dry, shaded area with good airflow.
Cover with paper bags if dust or seed drop is a concern. Screen or rack drying is another great option.
Spread leaves, flowers, or cut roots in a single layer on clean screens or racks. Keep in a warm, dry, shaded spot with good airflow.
Turn material occasionally for even drying. Paper-bag drying works for seeds and small flowers.
Place seed heads or delicate flowers in open paper bags. Hang bags in a dry area to catch falling seeds as they dry.
Herbs are properly dry when leaves and flowers feel crisp and crumble easily. Stems should snap rather than bend.
There should be no sign of trapped moisture or coolness to the touch. Delicate leaves and flowers typically take 1–2 weeks.
Thicker stems and roots can take several weeks, depending on conditions. Air-drying is well-suited to many Medicinal Garden Kit herbs like calendula, chamomile, lavender, lemon balm, and yarrow.
- Air-drying is gentle and preserves aroma and color.
- Hang small bundles upside down in warm, dry, shaded areas.
- Use screens or racks for leaves, flowers, and cut roots.
Turn material occasionally for even drying.
- Herbs are dry when crisp; stems snap, not bend.
Using a Dehydrator or Oven to Dry Medicinal Herbs

A dehydrator or oven might be preferable in some cases. Humid climates where air-drying is slow or risky are one example.
Thicker plant parts like roots that take a long time to air-dry are another. Dehydrator use offers good control.
Set to the lowest suitable temperature for herbs (often around 95–115°F / 35–46°C). Spread material in a single layer on trays.
Check frequently to avoid overheating or over-drying. Oven-drying is a less ideal but possible option.
Use the lowest possible temperature. Prop the door slightly open to allow moisture to escape.
Monitor closely to prevent scorching or aroma loss. Dehydrators offer more control and faster drying.
Ovens can easily get too hot and damage delicate herbs. Delicate flowers (chamomile, calendula) are best dried gently.
Tough roots (echinacea) can benefit from low-heat dehydration. Gardeners using the Medicinal Garden Kit may find a dehydrator helpful for processing larger harvests of roots and dense plant material.
- Use dehydrators in humid climates or for thick plant parts.
- Set dehydrator to lowest suitable temperature (95–115°F).
- Spread material in single layer; check frequently.
- Oven-dry on lowest setting with door slightly open.
- Monitor closely to prevent scorching or aroma loss.
How to Store Dried Medicinal Herbs for Maximum Potency

Proper storage conditions are key. Keep herbs in a cool, dark, and dry environment.
Store away from heat sources, sunlight, and humidity. Airtight glass jars with tight-fitting lids work well.
Dark glass or opaque containers protect from light. Avoid plastic bags for long-term storage if possible.
Labeling and organization matter. Label each jar with herb name and harvest date.
Group herbs by plant part or use (tea, topical, etc.). Shelf-life expectations vary.
Leaves and flowers are typically best within 6–12 months. Roots and bark can last 1–2 years or more if properly dried and stored.
Quality checks are important. Inspect periodically for signs of moisture, mold, or pests.
Discard any herbs that smell musty or look discolored. Proper storage ensures that herbs from the Medicinal Garden Kit retain their quality for multiple seasons of use.
-
- Store in cool, dark, dry environment.
- Use airtight glass jars with tight-fitting lids.
Label jars with herb name and harvest date.
- Leaves and flowers best within 6–12 months.
- Inspect periodically; discard musty or discolored herbs.
Common Mistakes to Avoid When Drying Medicinal Herbs

Frequent beginner mistakes include harvesting at the wrong stage (e.g., too late in the season). Washing herbs unnecessarily and not drying them thoroughly is another error.
Drying in direct sunlight can degrade color and aroma. Overcrowding drying racks leads to uneven drying and mold.
Storing herbs before they are fully dry causes problems. Patience is important.
Rushing the drying process can damage delicate plant compounds. Slow, gentle drying preserves quality better.
Keep similar-looking herbs separate and clearly labeled. Avoid assuming all “medicinal” herbs are safe for internal use without research.
Harvest in small, manageable batches. Match drying methods to the specific herb and plant part.
A well-structured starter kit and guide can help avoid some of these pitfalls by providing clear harvesting and drying instructions.
- Don’t harvest at the wrong stage; timing matters.
- Avoid washing unless necessary; dry thoroughly if washed.
- Don’t dry in direct sunlight; use shaded areas.
- Don’t overcrowd racks; allow good airflow.
- Ensure herbs are fully dry before storing.
Turning Dried Herbs into Simple Home Remedies

Dried medicinal herbs can be used in many ways. Teas and infusions from leaves and flowers are common.
Decoctions work for tougher plant parts like roots and bark. Tinctures offer long-term storage.
Sachets and pillows with aromatic herbs like lavender and lemon balm are great. Simple topical preparations like infused oils and salves work well for external use.
Typical tea ratios are 1–2 teaspoons dried herb per cup. Steeping times vary for delicate vs. tough plant material.
Basic safety reminders about allergies and interactions matter. Patch-test new ingredients if using in skin-care projects.
Avoid using herbs if you have known plant allergies; consult a qualified healthcare professional for health concerns. Keep dried herbs away from moisture to help preserve quality.
The Medicinal Garden Kit’s included guide is promoted as covering methods for turning its herbs into preparations such as teas, infusions, tinctures, oils, salves, and poultices.
See whether the collection suits your garden goals in this detailed Medicinal Garden Kit review.
- Make teas and infusions from dried leaves and flowers.
- Use decoctions for tougher roots and bark.
- Try tinctures for long-term storage.
- Create sachets with aromatic herbs like lavender.
- Always patch-test and consult professionals for health concerns.
Conclusion
Learning how to dry medicinal herbs properly is a key skill for any home herbalist.
Harvest at the right time for each plant part to maximize quality. Prepare herbs carefully by cleaning, sorting, and handling gently.
Use air-drying, dehydrators, or low-heat oven methods appropriately. Store dried herbs in cool, dark, airtight conditions for maximum potency.
Avoid common mistakes like drying in direct sun or storing before fully dry. You don’t need fancy equipment to start.
A few clean baskets, a shady spot with good airflow, and some patience can turn your garden harvest into a year-round home apothecary.
Readers ready to create a larger medicinal herb garden can explore the Medicinal Garden Kit and read the complete Medicinal Garden Kit review before choosing their seeds.
Sources and Further Reading
- Medicinal Garden Kit – Product page with seed varieties and guide details.
- Medicinal Garden Kit Review – In-depth review of the kit’s contents and features.
- Herbalism – Wikipedia – General information on traditional herbal practices.
- Mount Sinai Health Library – Herbs – Overview of various medicinal herbs and their traditional uses.
- University of Minnesota Extension – Growing Herbs – Practical growing and harvesting tips for home herb gardens.