
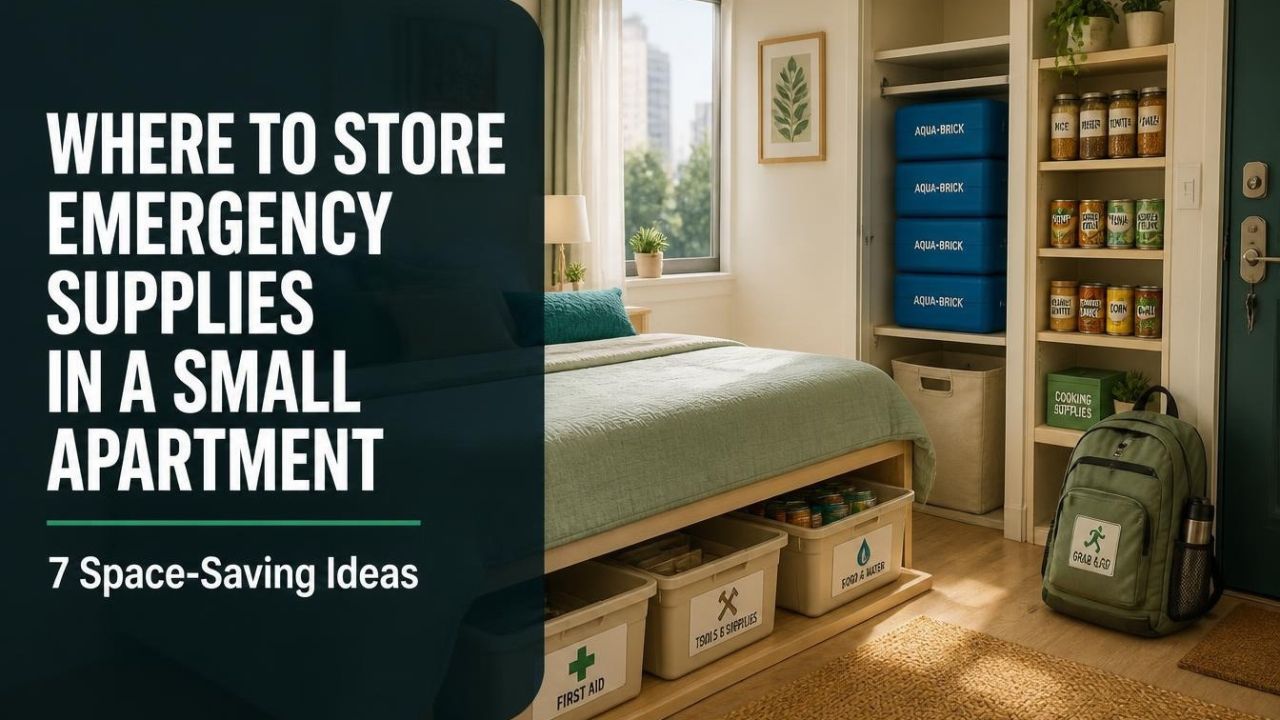
Here’s a number that stuck with me: guidance for UK households suggests 3 litres of drinking water per person, per day, for three days. Cute math until you live in 500 square feet!
I learned the hard way that where to store emergency supplies in a small apartment is the real puzzle. Let’s solve it together.
Start With a Realistic 72-Hour Emergency Kit

My first kit was a disaster. I bought everything in one weekend and stuffed it into three giant totes that blocked my closet door.
Now I build slowly. Government guidance says you don’t need to buy all the items at once.
Here’s my core list for the first week of shopping:
- Water: three days’ worth for each person
- Food: no-cook, shelf-stable items you actually like
- Light: a flashlight or headlamp plus spare batteries
- Radio: battery or hand-crank
- Papers: copies of ID, insurance and prescriptions
- Medication: a small first aid kit and any daily meds
Write the list down first. Honestly, a list keeps you from buying random gadgets (guilty!).
Then add one or two items each payday. After a couple of months, you’ll have a kit that fits your life and not a pile of clutter.
Not sure how deep to go? Learning resources can help you decide what really matters. I looked at David’s Shield for the low-tech, no-power angle.
Hide Your Emergency Water Storage in Dead Space

Water is the bulky one. I once lined up twelve round jugs in my hallway and tripped over them twice in one week.
Round jugs waste space. Rectangular, stackable containers use every inch, and WaterBricks-style containers are a common apartment fix.
The standard U.S. rule of thumb is 1 gallon per person per day, half for drinking and half for hygiene. That’s 3 gallons per person for a 72-hour stash.
Spots that worked for me:
- The floor of a closet, where shoes used to live
- Under the bed, in flat lidded containers
- Behind the couch, in a slim row
- Under a console table with a long tablecloth
Keep water low. Country Living also warns against heavy bottles on high shelves, where they’re hard to retrieve safely.
Keep it away from the stove, radiators and sunny windows. Heat is not your friend here.
I also rotate my water every 6–12 months, like most guides suggest. I write the date on tape and stick it on the lid.
Store Emergency Food Under Beds and in Closets

Under-bed space is the most underrated real estate in an apartment. One guide recommends you measure the gap between the floor and the bed frame before buying bins.
I didn’t do that. I bought bins that were two inches too tall, and returning them was a whole saga.
Now my system is simple:
- Flat bins with lids, so dust and pests stay out
- Canned goods, rice, pasta and oats inside
- Month and year written on every item
- New stock in the back, old stock in front (FIFO)
Pick foods your family already eats. Country Living suggests keeping a few extras alongside your usual groceries and using the oldest first.
That way nothing expires in the dark. My rule: if I wouldn’t eat it on a normal Tuesday, it doesn’t go in the bin.
Check everything every three months. I set a phone reminder, because otherwise I forget.
Use Vertical Space, Doors and One Grab Drawer

When the floor runs out, look up. Mountain House notes that hooks, pegboards, and over-the-door organizers are often underused.
I hung a shoe organizer inside my closet door. It holds wipes, snack bars, a poncho, gloves and spare batteries.
Then there’s my “grab drawer” by the entry. Country Living suggests one drawer holding a torch, spare batteries, a wind-up radio, a charged power bank, and copies of documents.
Quick layout I use on a shelf:
- Top: light items like bars and freeze-dried meals
- Middle: cans and jars
- Door: small pouches and first aid
- Floor: heavy bins and water
Use clear containers where you can. Seeing what’s inside saves a ton of digging.
And label everything. Future-you, in the dark, will be grateful.
Keep a Grab-and-Go Bag Near the Door

Sheltering at home isn’t the only scenario. Sometimes you have to leave fast.
New Zealand’s emergency guidance says a grab bag should hold water, snacks, a phone charger, cash, and copies of ID. I add a spare pair of glasses.
Mine lives on a hook behind the front door, not buried in a closet. If it takes you five minutes to find it, it isn’t a grab bag!
- Walking shoes and warm layers
- Water and snack food
- Hand sanitizer and a mask
- Portable charger and cash in small bills
- Medication list and ID copies
Check it when the clocks change. It’s an easy habit to remember, and it works for me.
Protect Your Electronics: The Microwave Faraday Myth

I used to hear that a microwave is a free Faraday cage, so I tossed a spare radio in mine. Then I looked into it.
Ofcom says a microwave behaves in a broadly similar way to a Faraday pouch for car fobs. But that’s about one specific signal, not a guarantee against everything.
A physics discussion makes it clearer. The door is designed to block about 2.45 GHz, and a microwave isn’t a true Faraday cage because of the gap around the door.
So treat it as a “maybe,” not a plan. Don’t bet your only radio on it.
If low-tech shielding and no-power skills interest you, this preparedness guide covers DIY Faraday enclosure instructions and more. It’s a learning resource, not gear, and it can’t promise protection.
The price listed is $67 digital, and a 60-day money-back guarantee is advertised. I’d read the full David’s Shield review first and then decide.
Keep Everything Organized With an Inventory
The best stash is useless if you can’t remember it. I keep a phone note listing every bin and where it lives.
One survival blog suggests an inventory list on your phone so you don’t double-buy. I’d add a printed copy in the grab drawer, in case the battery dies.
- Group items by type and how often you need them
- Keep water and first aid easiest to reach
- Toss dented or leaking cans
- Rotate stock every 6–12 months
Mountain House also advises you label containers and record locations in your checklist. Do it once and you’re set.
Final Thoughts
You don’t need a basement. You need a plan, a tape measure and a few flat bins!
Start with water, then food, then a grab-and-go bag. Use dead space, vertical space and one easy-to-find drawer.
If you want a low-tech roadmap to go with your storage, take a look at David’s Shield and compare it with the independent review.
Sources and Further Reading
- Country Living: Emergency essentials storage for small homes
- Ready Scotland: Make an emergency kit
- GetReady NZ: Work out what supplies you need
- Ofcom: Can your microwave thwart car thieves?
- Mountain House: Emergency prep for small spaces
- The Savvy Survivalist: Apartment prepping
- SHTF Prepper Club: Emergency food in small apartments
- Primal Survivor: Apartment prepping tips
- LifeTranq: David’s Shield review