
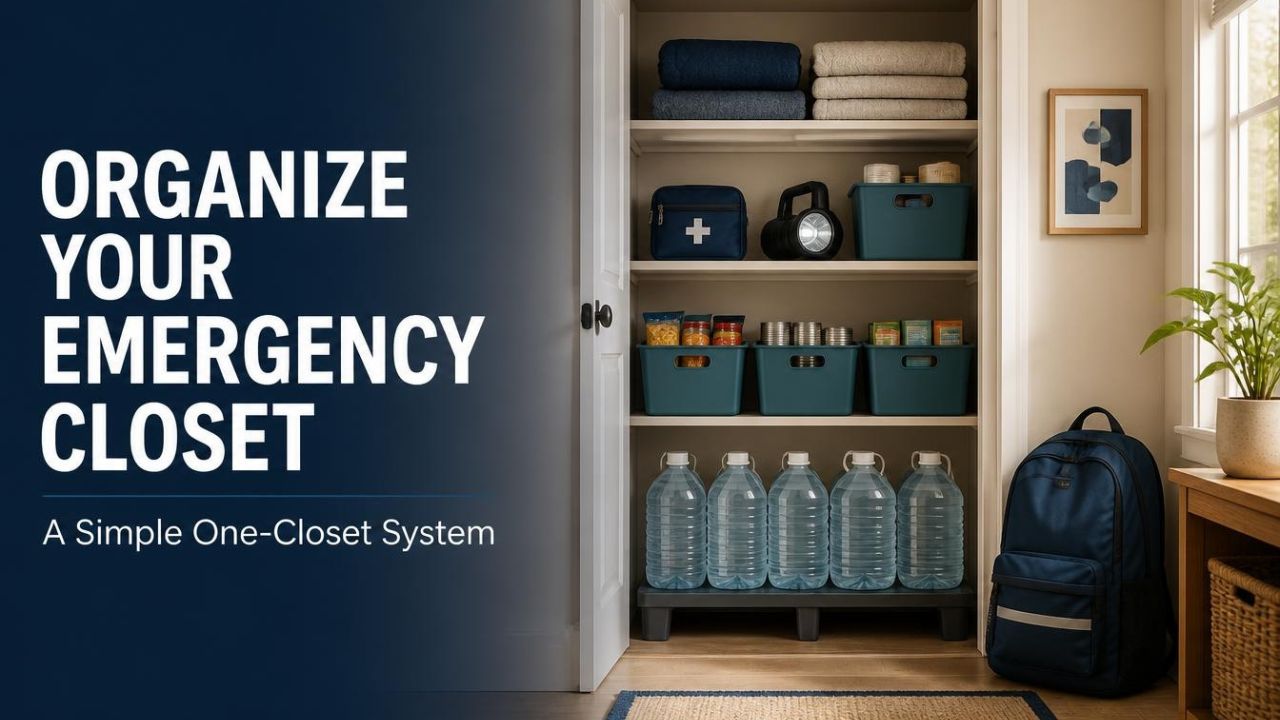
My approach to learning how to organize emergency supplies is simple: give each category a clear home, then make the important stuff easy to reach. A useful emergency closet doesn’t need matching baskets or fancy gadgets.
Below, I’ll walk you through a practical setup with shelf zones, labeled bins, safe water storage, and a maintenance routine. Think “easy to find,” not “perfect enough for a magazine.”
Affiliate disclosure: This article contains affiliate links. If you purchase through them, we may earn a commission at no additional cost to you.
1. Clear the Closet and Build Your Emergency Supply Checklist

I’d start with an empty closet and a notebook, not a shopping cart. Buying containers before measuring the space is an easy way to end up with lids that won’t clear the shelves.
Measure the usable width, shelf depth, vertical gaps, and doorway opening. Also check whether a loaded bin can slide out without moving everything beside it.
Next, gather the emergency supplies you already own. Use the Ready.gov emergency kit checklist to identify gaps rather than guessing what belongs in the closet.
- Water and several days of suitable nonperishable food.
- A manual can opener and basic eating supplies.
- Flashlights, a battery-powered radio, and appropriate spare batteries.
- A first aid kit and a plan for prescription needs.
- Hygiene supplies, essential documents, and household-specific items.
Build around the people who will use this kit. Ready.gov recommends reviewing supplies as family needs change, including needs related to infants, older adults, and other household circumstances.
I’d make three sorting areas: keep, replace, and store elsewhere. A leaking container belongs in the replace group, while something unsuitable for this closet needs a different home.
Keep learning materials separate from equipment purchases, too. David’s Shield’s preparedness material may interest readers exploring a Christian-oriented approach, but its website describes educational information and DIY plans—not a ready-made emergency kit.
You can organize a useful closet without purchasing a guide. If you want extra reading, evaluate the resource after the essentials are covered.
2. Create Emergency Closet Zones That Match Your Priorities

Here’s the layout I’d use: heavy supplies low, frequently needed items within comfortable reach, and lightweight extras above. Treat that as a starting design, then adjust it for your household and local hazards.
A person who uses a wheelchair may need a different access zone from someone who can comfortably reach a high shelf. The best arrangement is the one your household can actually use.
- Lower zone: water containers and heavier food bins on a suitable supporting surface.
- Middle zone: flashlights, radio, first aid supplies, and the printed checklist.
- Upper zone: lightweight blankets, spare clothing, and other soft items.
- Front access zone: an evacuation bag that can be lifted out immediately.
- Small-item zone: clearly labeled pouches for cables, utensils, and other loose supplies.
Don’t assume a closet shelf can support every container you can squeeze onto it. Check the shelving manufacturer’s load limits and installation requirements before adding heavy supplies.
Water placement also needs judgment. CDC guidance for larger emergency water storage emphasizes structural support and following container stacking limits, so don’t turn a lightweight shelf into a miniature warehouse.
In a flood-prone home, low storage may be unsuitable for vulnerable items. Follow local emergency guidance and choose the safest accessible location rather than applying a shelf diagram blindly.
Ready.gov recommends a designated kit location that everyone in the family knows. I’d put a simple shelf map inside the door so nobody has to memorize my organizing system.
However, one closet should be your main station—not your only source of supplies. Ready.gov also recommends kits for work and vehicles because emergencies don’t wait until everyone gets home.
And keep the closet entrance clear. A beautifully labeled bag isn’t much help if reaching it requires unloading a vacuum cleaner and three laundry baskets.
3. Store Emergency Water and Food Without Wasting Space

Water deserves its own plan before you buy a stack of food bins. According to the CDC’s emergency water guidance, store at least one gallon per person per day for three days, and aim for two weeks if possible.
For two people, that three-day starting point is six gallons. Some people and conditions require more, so use the CDC guidance to adapt the amount rather than treating the minimum as a universal guarantee.
I’d choose containers I can move when filled, not just containers that look efficient when empty. Several manageable containers may suit your household better than one awkward vessel.
- Follow the expiration date on commercially bottled water.
- Replace water stored in home-filled containers every six months.
- Label home-filled containers “drinking water” and add the storage date.
- Keep stored water away from direct sunlight and toxic substances.
- Use appropriate food-grade water containers and follow CDC cleaning instructions.
The CDC recommends a cool storage location, ideally 50–70°F for home-stored water. A closet beside a hot utility area may need a rethink.
For food, I’d build a short menu before filling shelves. Ready.gov recommends familiar nonperishable foods and options that don’t depend on refrigeration, cooking, added water, or special preparation.
Think ready-to-eat canned meals, suitable fruit cups, and other foods that fit your household’s dietary needs. Include the manual can opener where you can actually find it.
Use a first-in, first-out arrangement: newer supplies at the back, older supplies in front. That approach is included in FEMA’s citizen preparedness guide.
Finally, keep chemical products out of the food-and-water zone. CDC specifically warns against storing emergency water near substances such as gasoline or pesticides.
4. Label Emergency Supply Bins and Create a Printed Inventory

My rule for labels is boring on purpose: use words people understand immediately. “Lighting” beats “miscellaneous,” and “first aid” beats a mystery red sticker.
I’d label the front and top of each bin so the category stays visible whether the container is shelved or sitting on the floor. Numbering the bins makes a printed inventory easier to follow.
For example, give the lighting bin the code L1 and the hygiene bin H1. You don’t need a complicated database—just a naming system you’ll keep using.
- Bin code and category.
- Item name and quantity.
- Exact shelf or storage location.
- Expiration date or next inspection date, where applicable.
- Replacement notes and household-specific instructions.
An inventory entry might read: “L1 — two flashlights — middle shelf — check batteries at next review.” For home-filled water, record the filling date and the six-month replacement reminder.
I’d keep a paper copy inside the closet and an editable digital copy for updates. A printed list is simply my practical preference for a system that doesn’t require opening an app.
Place sensitive documents in an appropriately protected pouch rather than displaying account numbers on the door. FEMA’s winter storm checklist recommends a waterproof, portable container for important documents.
Reserve another folder for emergency contacts and selected instructions. If you buy an educational guide, check what offline access or printing its format and license allow before assuming it will be available during an outage.
For a closer look at this particular resource, read the David’s Shield review alongside the seller’s disclosures. I would compare the content, format, current checkout terms, and any implementation costs before buying.
5. Check Your Emergency Kit and Practice Finding Supplies

Organizing the closet is the first job; keeping it useful is the ongoing one. FEMA recommends checking emergency supply needs every six months and updating them as your household changes.
I’d set two reminders a year and review the printed inventory with the closet door open. That makes it easier to notice what’s missing instead of approving the list from memory.
- Inspect food packaging and replace unsuitable or expired items.
- Review dates on bottled water and home-filled containers.
- Test lights and radios according to their instructions.
- Check that the appropriate spare batteries and cables are present.
- Update contact details and household-specific supplies.
- Inspect the evacuation bag and replace anything borrowed from it.
Follow the storage instructions for each medicine rather than assuming the closet suits every prescription. FEMA’s checklist specifically calls for medication planning, including refrigeration needs where relevant.
Now try a simple retrieval exercise. Ask another household member to locate the flashlight, first aid kit, radio, and evacuation bag while the room is normally lit.
If finding the radio requires opening five bins, change the layout. No big deal—that’s exactly what a practice run is for.
I’d also ask everyone to carry the evacuation bag a short, safe distance. If it’s awkward to lift, revisit the contents and divide responsibility according to household abilities.
Once the basics work, optional learning can come next. Explore the David’s Shield educational offer if its faith-oriented presentation suits your interests.
Keep the distinction clear: purchasing information is not the same as obtaining tested protective equipment or professional advice. The seller’s own disclaimer describes educational material and DIY plans, so evaluate any technical or safety-sensitive instruction before using it.
Conclusion: Make Your Emergency Closet Easy to Use
Accessibility matters more than matching bins. Start with a checklist, create clear shelf zones, label the containers, and keep a printed inventory where your household can find it.
Then schedule a six-month review and practice retrieving the basics. One useful closet beats a pile of supplies nobody can locate!
For an optional next step, compare the David’s Shield review with the seller’s current information. Choose learning materials that fit your needs without letting them replace your emergency essentials.