
What Is a Medicinal Herb Garden?

A medicinal herb garden is a growing space for plants traditionally used in teas, aromatic preparations, topical products, cooking, and general household herbalism. It can be designed around your interests rather than copied from someone else’s homestead.
For one gardener, it may be a small tea garden with chamomile, lemon balm, and lavender. For another, it might include calendula, yarrow, echinacea, marshmallow, and other plants selected for traditional topical or household uses.
The phrase “grow your own medicine” sounds powerful, but it needs a sensible definition. Garden-grown herbs are not automatically safer than commercial medicines, and they should never be used to delay urgent treatment or replace a prescribed therapy.
I think of a backyard pharmacy garden as a living classroom. You learn:
- How plants grow in your local conditions.
- Which herbs return each year and which must be replanted.
- How to harvest without damaging the plant.
- How to dry and store plant material properly.
- Which herbs require extra caution before internal or topical use.
That last point matters. A plant may be traditional, popular, and natural, yet still be unsuitable for a child, a pregnant person, someone with an allergy, or someone taking medication.
Start with five to ten herbs. That number is enough to learn the basics without turning your garden into an unlabeled jungle by midsummer.
Choose the Right Location Before Buying Seeds

The best garden location is not necessarily the most attractive part of the yard. It is the place with suitable sunlight, good drainage, easy water access, and enough room to care for the plants.
Before planting, observe the area at different times of day. I like to check it in the morning, around noon, and in the late afternoon because a space that seems sunny early can become shaded later.
Many common herbs prefer several hours of sunlight and soil that drains well. Iowa State University Extension notes that herbs generally perform well in sunny locations and may struggle in extremely wet soil.
Look for these features:
- At least four to six hours of suitable sunlight for many common herbs.
- Soil that does not remain flooded after rain.
- Protection from strong wind.
- Easy access to a hose or watering can.
- Enough room to walk around the bed.
- A location away from areas treated with unknown chemicals.
Convenience is more important than people think. A garden near the kitchen door will usually be watered and harvested more often than one hidden behind a shed.
If your soil is heavy, contaminated, or poorly drained, use raised beds or containers. Containers also make sense for herbs that spread aggressively, especially mint and lemon balm.
Do not forget the mature plant size. A seedling can look tiny and innocent in spring, then occupy half the bed by summer. It happens.
Start With Easy Medicinal Herbs for Beginners

When choosing medicinal plants for beginners, I focus on three things: growing difficulty, usefulness to the gardener, and whether the plant fits the available conditions.
The “strongest” herb is not automatically the best first plant. A reliable calendula plant that you can identify and harvest is more useful than a difficult variety that never gets established.
Calendula
Calendula is one of my favorite beginner choices because its bright flowers are easy to notice and harvest. It can grow in beds or containers, and it adds color to a practical garden.
Calendula is commonly used in traditional topical preparations, but do not apply homemade products to serious wounds, deep cuts, burns, infected skin, or unknown rashes without professional advice.
Chamomile
Chamomile is popular in herbal tea gardens. Check the botanical name on the packet because German chamomile and Roman chamomile have different growth habits.
The flowers are small, so a shallow basket works better than a deep bag during harvesting. Otherwise, flowers at the bottom can be crushed and become damp.
Lavender
Lavender is aromatic, attractive to pollinators, and useful for simple fragrance projects. Its main requirement is excellent drainage.
My early mistake was treating lavender like a thirsty vegetable. The soil stayed wet, the lower stems looked unhappy, and the plant eventually failed. It was not the lavender’s fault; it was my watering plan.
Lemon Balm
Lemon balm has a fresh citrus scent and is often grown for tea and aromatic use. It can spread quickly, so containers are usually safer in a small garden.
Mint
Mint is easy to grow, but it is famous for spreading. Plant it in a pot with drainage holes unless you genuinely want mint appearing in nearby beds.
Echinacea
Echinacea is a flowering perennial that can attract pollinators. It may take time to establish, so patience is required.
Yarrow and Feverfew
Yarrow and feverfew are attractive flowering herbs that may suit a pollinator-friendly medicinal garden. They also require careful identification and safety research before any internal use.
A useful beginner list might include:
- Calendula.
- Chamomile.
- Lavender.
- Lemon balm.
- Mint in containers.
- Echinacea.
- Yarrow.
- Feverfew.
- Marshmallow.
- Evening primrose, where suitable for your region.
Plan a Simple Backyard Pharmacy Garden Layout
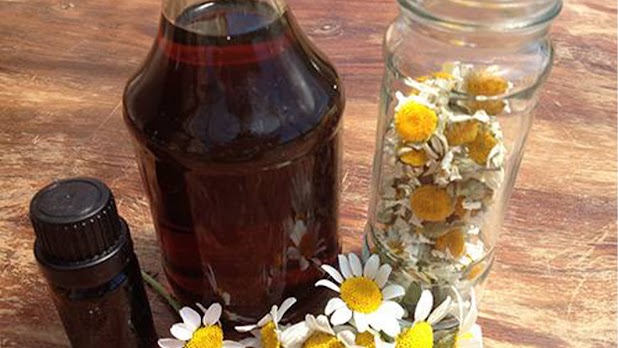
A medicinal herb garden layout should be based on plant needs, not just color. Group herbs that like similar sunlight, soil moisture, and spacing so maintenance stays manageable.
For example, lavender should not share the same constantly wet irrigation zone as a moisture-loving plant. Mint should be contained. Taller perennials should be placed where they will not shade shorter annual herbs.
Here is a simple layout for a small raised bed:
- Back row: echinacea, marshmallow, or other taller plants.
- Middle row: calendula, yarrow, chamomile, and feverfew.
- Dry corner: lavender and herbs that prefer excellent drainage.
- Containers: mint and lemon balm.
- Path edge: low-growing herbs that are easy to reach.
Leave pathways wide enough to reach the center of the bed. It is frustrating to discover that the best flowers are growing in the exact middle of a bed you cannot comfortably reach.
Use plant labels made from wood, metal, or weather-resistant plastic. Write both the common name and botanical name when possible.
Keep a basic garden journal with:
- Seed source and variety.
- Planting date.
- Germination date.
- Watering problems.
- Flowering period.
- Harvest date.
- Notes for the next growing season.
This record becomes surprisingly valuable. After one season, you will know which herbs loved your garden and which ones were acting like difficult houseguests.
Prepare Healthy Soil and Basic Garden Supplies

Most medicinal herbs do not require complicated soil recipes. They need soil that drains reasonably well, contains organic matter, and is not overloaded with fertilizer.
Some gardeners assume that more fertilizer means stronger medicinal plants. That is not a safe assumption. Excess fertilizer can encourage weak, leafy growth and may create a garden that needs constant staking.
Prepare a new bed by:
- Removing weeds and old plant debris.
- Loosening compacted soil.
- Adding mature compost when appropriate.
- Checking drainage after watering.
- Using raised beds if water pools.
- Following the seed packet for planting depth and spacing.
Keep your tool list modest:
- Hand trowel.
- Sharp pruning scissors.
- Watering can with a gentle nozzle.
- Plant labels.
- Seed trays, if starting indoors.
- Lightweight seed-starting mix.
- Clean jars for dried herbs.
- A notebook for garden records.
For containers, choose pots with drainage holes. A decorative pot without drainage may look nice for a week, but it can become a swamp after a rainy spell.
Use a quality potting mix for containers rather than dense garden soil. Match the pot size to the mature plant, especially for perennial herbs that will remain in place for more than one season.
Seeds, Seedlings, or a Medicinal Garden Kit?
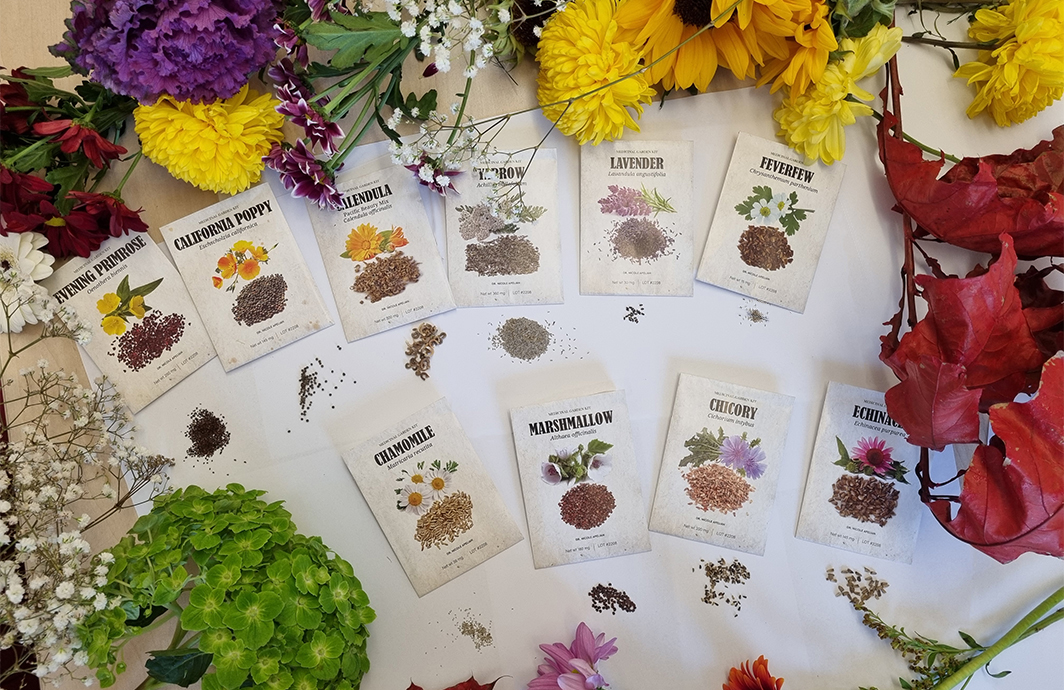
Starting from seed is affordable and gives you many options, but it requires patience. Seedlings are faster, while a curated medicinal garden kit can simplify the research stage.
I compare the three choices this way:
- Seeds: usually lower cost per plant and more varieties.
- Seedlings: faster results and less early germination work.
- Garden kits: convenient for beginners who want a themed collection.
The product page for the Medicinal Garden Kit says that it includes 10 herb varieties: chicory, yarrow, California poppy, marshmallow, chamomile, evening primrose, lavender, echinacea, calendula, and feverfew.
The same page states that the kit contains 4,818 non-GMO seeds and includes a digital guide called Herbal Medicinal Guide: From Seeds to Remedies. The guide is described as covering planting, growing, harvesting, and preparation methods.
A kit may suit someone who wants one themed purchase instead of hunting for individual packets. Still, the included varieties should be checked against your climate, available space, and intended garden use.
Before buying, I would review:
- The full seed list.
- Botanical names and growing instructions.
- Expected planting season for your region.
- Whether the plants are annuals, biennials, or perennials.
- Seed quantity and packaging information.
- Refund terms and customer support.
It is also sensible to read a balanced Medicinal Garden Kit review before deciding.
Plant Medicinal Herb Seeds Successfully

The seed packet is your first growing guide. I used to plant every seed at the same depth, which is not a good plan. Tiny seeds and large seeds have different needs.
Before sowing, check:
- Recommended planting depth.
- Spacing between plants.
- Expected days to germination.
- Whether the seed should be started indoors.
- Whether cold treatment is recommended.
- Light and moisture requirements.
For indoor seed starting, use clean trays and a lightweight seed-starting mix. Moisten the mix before sowing so you do not disturb the seeds with a heavy stream of water afterward.
Keep the surface evenly moist, not soaked. Poor airflow and excessive moisture can lead to weak or diseased seedlings.
A beginner-friendly process is:
- Fill a clean tray with seed-starting mix.
- Moisten the mix evenly.
- Plant seeds at the packet’s recommended depth.
- Label every variety immediately.
- Place the tray in a warm, bright location.
- Water gently when the surface begins to dry.
- Thin crowded seedlings after true leaves appear.
- Harden seedlings before transplanting outdoors.
Hardening off means gradually exposing young plants to outdoor sun, wind, and temperature changes. Move them outside for short periods at first, then increase the time over several days.
Some medicinal herbs germinate slowly. Do not throw away the tray after three days because nothing has appeared. Check the expected germination period and keep conditions steady.
Water, Weed, and Maintain the Garden

A medicinal herb garden does not need constant attention, but it does need regular observation. I prefer short checks several times a week instead of one giant weekend rescue mission.
Check the soil before watering. The top may look dry while the lower root zone is still wet, especially in containers without strong drainage.
Helpful maintenance habits include:
- Water near the soil instead of keeping leaves wet.
- Water deeply when the soil needs it.
- Remove weeds while they are small.
- Use a light mulch layer to reduce weeds and conserve moisture.
- Leave space between plants for airflow.
- Remove diseased leaves promptly.
- Contain spreading herbs in pots.
- Deadhead flowers when you want to encourage more blooms.
Do not put all herbs on one watering schedule. Lavender may prefer a drier location, while marshmallow and some other herbs may perform better with more consistent moisture.
Heavy feeding is often unnecessary. A moderate amount of compost and healthy soil can be enough for many herbs.
When pests appear, look closely before reaching for a strong product. A few holes do not necessarily mean the plant is doomed. Hand removal, improved airflow, and attracting beneficial insects can often help.
If you plan to use herbs in teas or topical preparations, be especially careful with pesticides and unknown garden chemicals. Keep clear records of anything applied to the plants.
Harvest Medicinal Herbs Without Damaging Them

Harvesting is when the garden starts to feel real. Until then, you are mostly watering, weeding, and wondering if the tiny green shoots will ever become something useful.
For many herbs, leaves are harvested after the morning dew has dried and before the day becomes intensely hot. The University of Maryland Extension recommends clean hands, clean scissors, and a clean harvest container.
General harvest guidance includes:
- Leaves: harvest once the plant has enough foliage to continue growing.
- Flowers: harvest when fresh and open, before they become brown or wilted.
- Seeds: collect when mature and beginning to dry.
- Roots: harvest only from correctly identified, established plants and follow reliable guidance.
Cut stems cleanly above a leaf node when possible. This can encourage branching instead of leaving a ragged stem.
Do not strip a young plant completely. A cautious approach is to harvest only a portion of the plant and allow it to recover before taking more.
Keep these habits in place:
- Harvest only healthy plants.
- Confirm the plant’s identity before using it.
- Do not collect from areas treated with unknown chemicals.
- Use an open basket that allows airflow.
- Do not leave fresh herbs compressed in a warm plastic bag.
- Label herbs immediately after cutting.
If you are unsure what a plant is, do not consume it. Common names can be confusing, and similar-looking plants are not interchangeable.
Dry and Store Herbs for Later

Drying herbs is simple, but it rewards patience. My first bundle was tied too tightly and placed in a room with poor airflow. It smelled less like lavender and more like a damp closet. Not ideal.
The University of Maryland Extension recommends air drying herbs in small bunches in a warm, dry, well-ventilated indoor space. Sun drying is not recommended because herbs may lose color and flavor, and summer humidity can reduce quality.
To air-dry herbs:
- Remove damaged, dirty, or insect-damaged leaves.
- Rinse under cool running water if needed.
- Shake off excess water gently.
- Tie a small bundle by the stems.
- Place it in a clean paper bag with ventilation holes, if desired.
- Hang it in a dry, shaded, well-ventilated room.
- Check regularly for moisture or mold.
A dehydrator can be useful in humid conditions. UMD Extension lists approximately 95°F to 115°F as a common dehydrator range, although the appliance instructions should always be followed.
Herbs are dry when leaves crumble easily and stems break when bent. If the leaves bend or feel cool and flexible, more drying is needed.
Store dried herbs:
- In clean, airtight containers.
- With the herb name and harvest date clearly written.
- In a cool, dark, dry location.
- Away from sunlight, moisture, heat, and strong odors.
Check jars during the first week. Condensation means the herbs were not dry enough. If mold appears, discard the batch rather than trying to save it.
Make Simple Herbal Preparations Carefully

After drying herbs, most people want to make something. That is understandable. A jar of dried chamomile sitting in the cupboard seems to be asking for a teapot.
Begin with simple projects and learn one preparation at a time. Common herbal preparation terms include:
- Infusion: steeping delicate leaves or flowers in hot water.
- Decoction: simmering tougher plant material, such as some roots.
- Infused oil: transferring plant compounds or fragrance into a carrier oil.
- Salve: thickening an infused oil for external use.
- Poultice: applying prepared plant material externally.
- Bath sachet: placing dried aromatic herbs in a cloth bag for bath water.
These terms describe methods, not guaranteed medical results. Avoid claiming that a homemade preparation cures cancer, replaces antibiotics, stops serious bleeding, treats depression, or fixes a chronic disease.
The NCCIH explains that safety depends on the specific herb and product. It also notes that manufacturers generally do not have to prove the safety and effectiveness of dietary supplements before they reach the market.
Before using a new herb internally or on the skin, check a trusted reference for:
- Correct plant identification.
- Recommended plant part.
- Preparation method.
- Known side effects.
- Medication interactions.
- Pregnancy and breastfeeding cautions.
- Allergy concerns.
The NCCIH discussion of drug-herb interactions points out that in many cases the evidence is incomplete. That means “we are not sure” is sometimes the most honest answer.
Never use a homemade preparation on a deep wound, serious burn, infected area, severe rash, or emergency condition without professional advice. A garden can support self-reliance, but it should not encourage risky delays in treatment.
Common Medicinal Garden Mistakes to Avoid

The biggest mistake is trying to create a complete herbal pharmacy in one weekend. I understand the temptation, especially when seed collections show so many beautiful and useful plants together.
A smaller garden is easier to identify, water, weed, harvest, and learn from.
Try to avoid:
- Planting too many herbs before understanding their mature size.
- Growing mint directly in an open bed.
- Putting dry-loving and moisture-loving herbs together.
- Skipping plant labels.
- Planting seeds too deeply.
- Overwatering young seedlings.
- Harvesting too heavily from young plants.
- Drying herbs in direct sunlight.
- Storing herbs before they are completely dry.
- Using a plant based only on a common name.
- Assuming natural products are automatically safe.
- Making medical claims without credible evidence.
Another mistake is ignoring your local growing season. A seed collection may be useful, but not every included herb will mature at the same speed or thrive in the same climate.
Write down what happened when a plant fails. Was it too wet, too shaded, crowded, or started too late? The failure becomes useful information once it is recorded.
Frequently Asked Questions
How much space is needed for a medicinal herb garden?
A few containers or a small raised bed can be enough to begin. Prioritize sunlight, drainage, plant spacing, and easy access for watering and harvesting.
What are the easiest medicinal herbs to grow?
Calendula, chamomile, lemon balm, lavender, mint in containers, yarrow, and echinacea are common starting choices. The best option depends on your climate and soil.
Can medicinal herbs be grown in containers?
Yes. Containers are useful for balconies, patios, poor soil, and herbs that spread aggressively. Make sure the containers have drainage holes.
Is a medicinal garden kit good for beginners?
A kit can be convenient if you want a themed selection of seeds and supporting instructions. Before buying, check the included varieties, growing requirements, seed information, and refund policy.
Are homemade herbal remedies safe?
Not automatically. Herbal products can cause side effects, allergies, contamination, and drug interactions. Consult a qualified healthcare professional before using herbs internally or medicinally, especially when taking medication.
Start Your Backyard Pharmacy One Herb at a Time

Learning how to start a medicinal herb garden for beginners is less about creating a perfect homestead and more about building a useful relationship with your plants.
Choose a manageable location. Start with herbs that suit your climate. Label every plant, water according to its needs, harvest carefully, and dry your herbs completely before storage.
If you want a curated way to begin, the Medicinal Garden Kit offers a themed collection of medicinal herb seeds and a digital guide. Review the included plants carefully and decide whether they match your garden space and goals.
You can also read the detailed Medicinal Garden Kit review before making a purchase.
Your first garden does not need to be large, fancy, or flawless. It only needs to be planted, observed, and given time to teach you something.
Sources and Further Reading
- National Center for Complementary and Integrative Health: Safe Use of Complementary Health Products and Practices
- NCCIH: Finding Answers to Questions About Drug-Herb Interactions
- University of Maryland Extension: Harvesting and Preserving Herbs
- Iowa State University Extension: Growing, Harvesting, and Drying Herbs
- Oregon State University Extension: Drying Herbs
- Medicinal Garden Kit: Product Information